Creating, Editing, and Deleting Projects
Managing projects in Weissr Capex is essential for keeping workflows organized and up to date. This guide provides step-by-step instructions for creating new projects, updating existing ones, and removing unnecessary projects.
Whether you’re starting a new investment initiative, modifying project details, or cleaning up old data, this page will help you navigate these core actions with ease and efficiency.
Here’s what you’ll find:
Creating Projects: Learn how to set up new projects and ensure all required information is included.
Editing Projects: Discover how to update project details and keep your data accurate.
Deleting Projects: Understand the process for safely removing projects and what considerations to keep in mind.
Create a New Request/Project
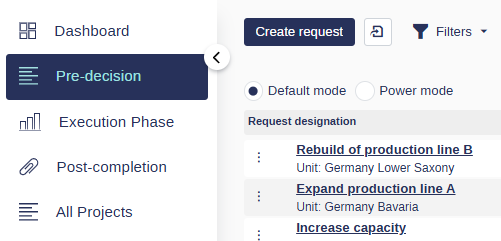
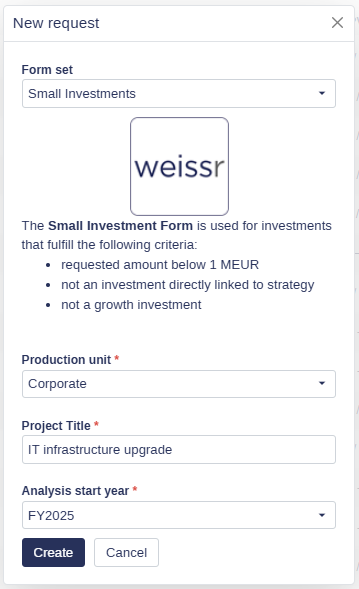
Follow these steps to create and prepare a new request or project:
Editing Requests/Projects
Editing a project is straightforward:
Open the Project
Locate the project in a Project List and click to open it.
Update Data
Navigate through the project’s tabs (e.g., Form Tab, Capex/Opex Tab, Investment Model Tab) to update necessary fields.
Changes are automatically saved when you leave a field.
Editing After Final Approval
Once final approval is granted, the request transitions to the Project Execution Phase, and:
Pre-approval forms and grids become uneditable.
New forms and grids appear for post-approval updates, allowing actual data entry.
Note: All changes are logged in the Logs Tab for transparency.
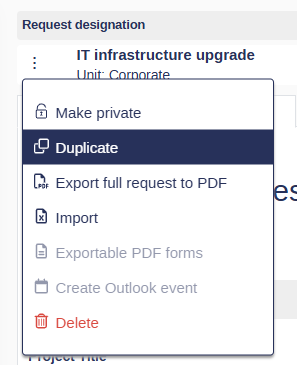
Duplicate a Request/Project
Delete a Project
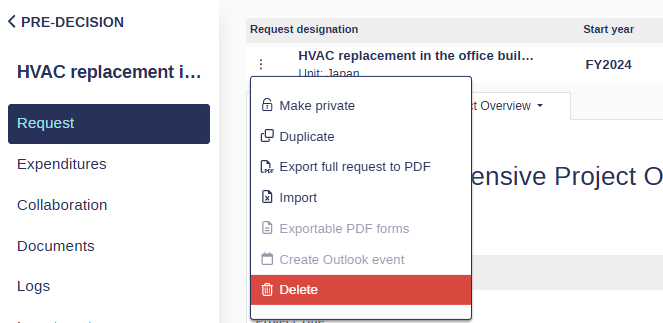
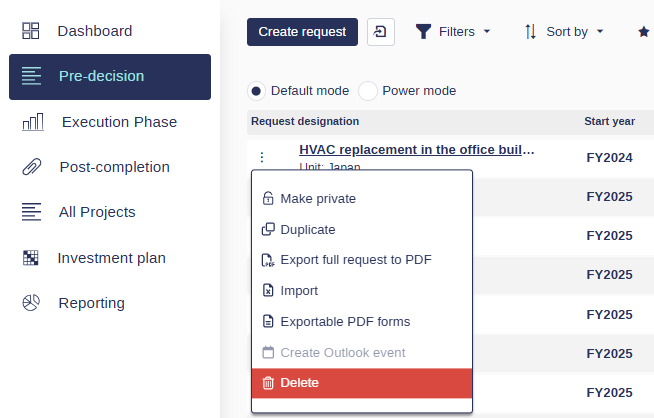
You can delete a request/project via its context menu in one of two locations:
1. Deleting within the Project
Navigate to the project you want to delete.
Open the context menu (three dots)
Select Delete from the dropdown menu.
Confirm the deletion in the pop-up dialog.
2. Deleting a Request/Project from the Project List
Go to the Project List for not yet approved projects.
Locate the project you want to delete.
Click the context menu (three dots) next to the project name.
Select Delete from the dropdown menu.
Confirm the deletion in the pop-up dialog.
Who Can Delete a Project?
You can delete a project if:
You are the creator of the project.
You have Create permission for the production unit associated with the project.
Note: If you don’t meet these criteria, the Delete option will not appear.
Important Notes
The Delete option will only appear if the request/project has not been approved.
The Delete option will be unavailable if the request/project is approved or you do not have the required permissions.
Deleted requests/projects cannot be restored, so proceed with caution.
Troubleshooting
Cannot Find the Delete Option?
Ensure the request/project has not been approved.
Confirm that you are the creator or have Create permissions for the production unit.
Accidental Deletion?
Unfortunately, deleted projects cannot be recovered from the application.
If necessary, submit a support ticket for additional assistance on restoring a deleted project.
