Approval Routes - Routes
Approval routes in Weissr Capex define the sequence of approvals required for requests, ensuring that they are reviewed and approved by the appropriate individuals or groups before moving to the next stage of a project. These routes help maintain compliance, streamline workflows, and adapt to different approval processes based on project requirements.
This documentation provides a comprehensive guide to configuring and managing approval routes.
Configuring approval routes
To configure a new approval route:
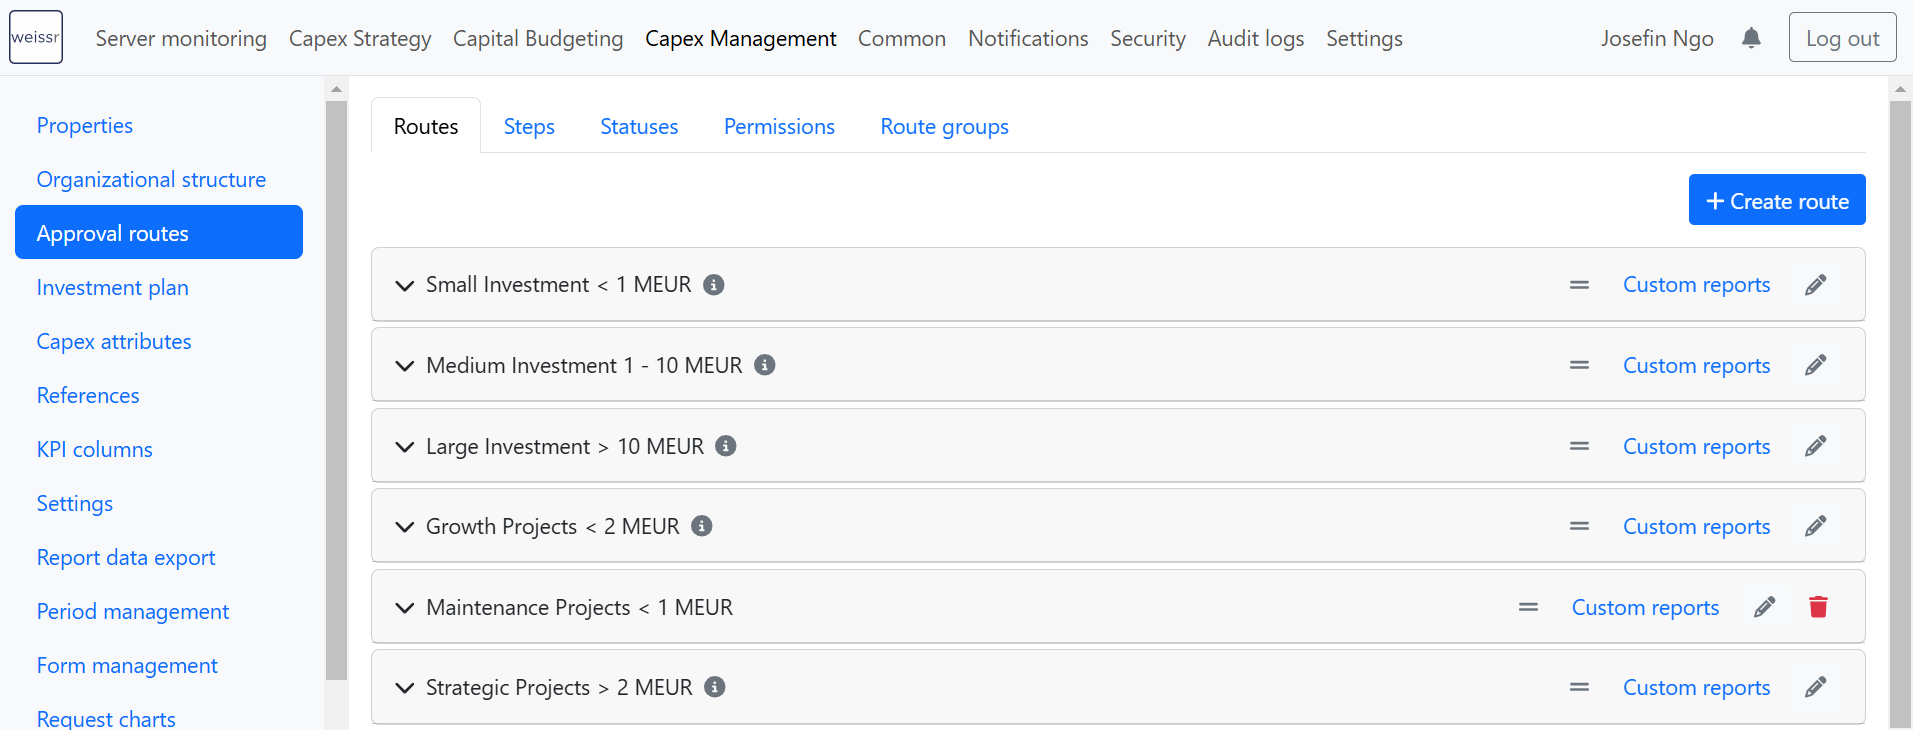
Navigate to Administration → Capex Management → Approval Routes.
The Routes tab allows administrators to:
Create, delete, and reorder routes.
Add and remove steps in an approval route.
Enable notifications for step changes.
Attach document templates to approval steps.
Define required properties for route steps.
Replace step approval with a final approval in sub-requests.
Creating and managing routes
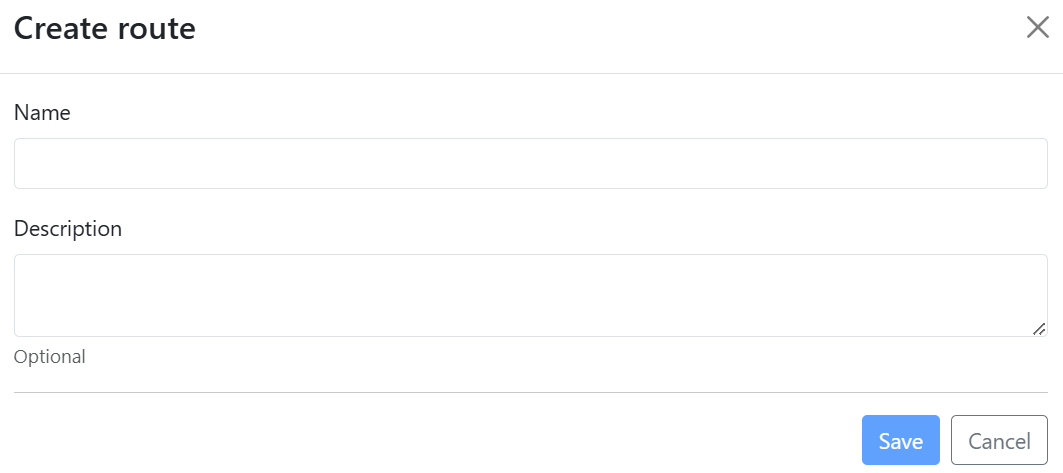
Creating a new route
Click "Create route" in the upper right corner.
Fill in the route name (required) and description (optional).
Example: "Maintenance 5 – 20 MEUR" (for investment category-based routing).
Click Save.
Route names should be descriptive and reflect the approval process they handle.
Edit route name and description
Click the pen icon for the route you want to edit.
Change the route name and description.
Click Save.
Deleting a route
Routes that are currently used in ongoing requests cannot be deleted. However, individual steps within a route can be removed and restored as needed.
If a route is in use, the red trash bin icon will not be available for deletion.
Reordering routes
To change the order of routes:
Drag and drop the route into the desired position.
This affects how routes appear in dropdown selections across the application.

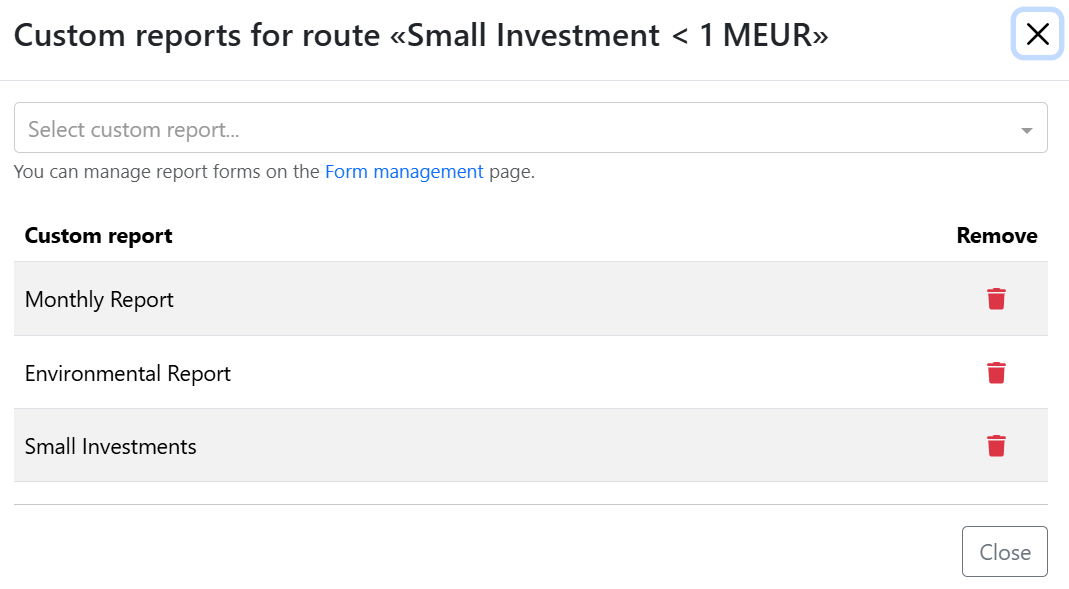
Attaching custom reports to routes
Custom reports allow users to generate PDFs with request data, providing a structured way to review and share approval details. For information on creating custom reports, refer to Form Management → Creating and Designing Forms.
Each approval route can have multiple custom reports attached, ensuring flexibility in documentation.
How to Attach a Custom Report to a Route
Click on the “Custom reports” link within the route settings.
Select a custom report from the list.
Once selected, the report is automatically saved to the route.
Managing steps in approval routes
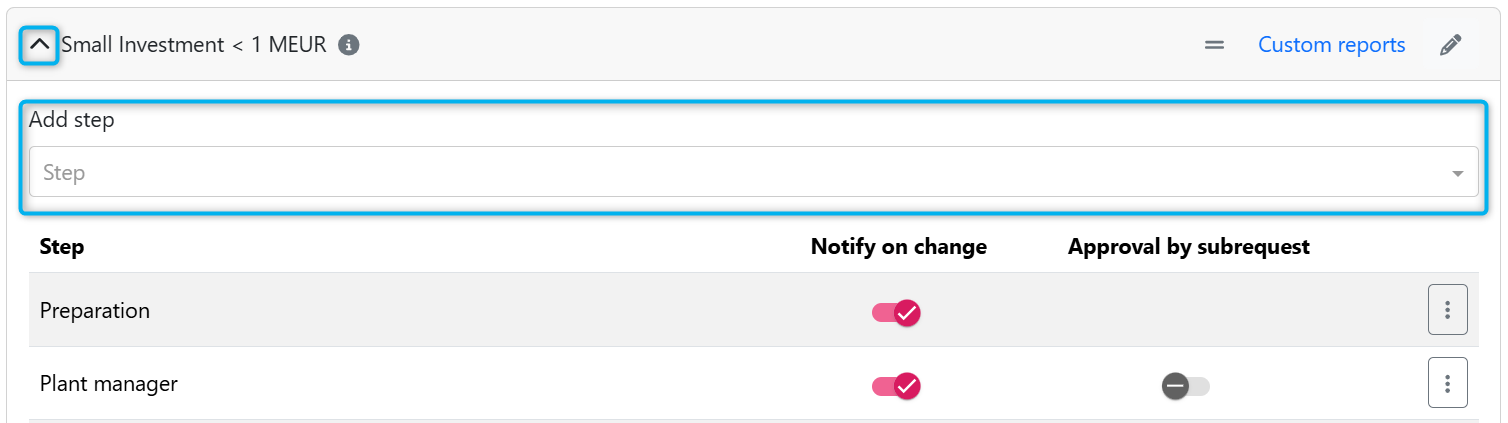
Adding steps to a route
Before adding steps to a route, ensure they are configured in the Step Library with the necessary properties and settings.
Expand the route by clicking the arrow icon.
Select a step from the step library in the dropdown menu.
Steps are automatically sorted based on their order in the library.
Removing route steps that are used
Route steps in active approval requests can be soft deleted, meaning they are removed from the approval process but can always be restored if needed. Steps that have been used in a request cannot be permanently deleted to ensure historical tracking remains intact.
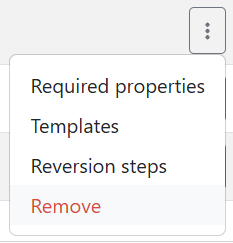
How to remove a route step
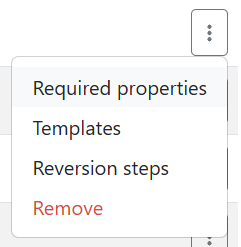
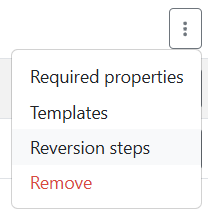
Expand the desired route and click the context menu (three dots).
Select “Remove” from the dropdown menu.
Confirm your deletion in the pop-up.
SpecialcCase: Removing the Final approval step
If the step you are removing is the last step before entering Monitoring (typically called Final Approval), a warning will appear.
You must choose whether to move existing requests forward (into monitoring state) or back before deletion.
What happens after deletion?
The removed step is marked with a strikethrough to indicate it is no longer active.
Requests that have not yet reached this step will no longer see it in the Approvals tab.
Requests that have already passed this step will see it greyed out, indicating its inactive state.
The step can be restored at any time, with all its previous settings and configurations.
For historical tracking purposes, deleted steps remain in the system and cannot be permanently removed.

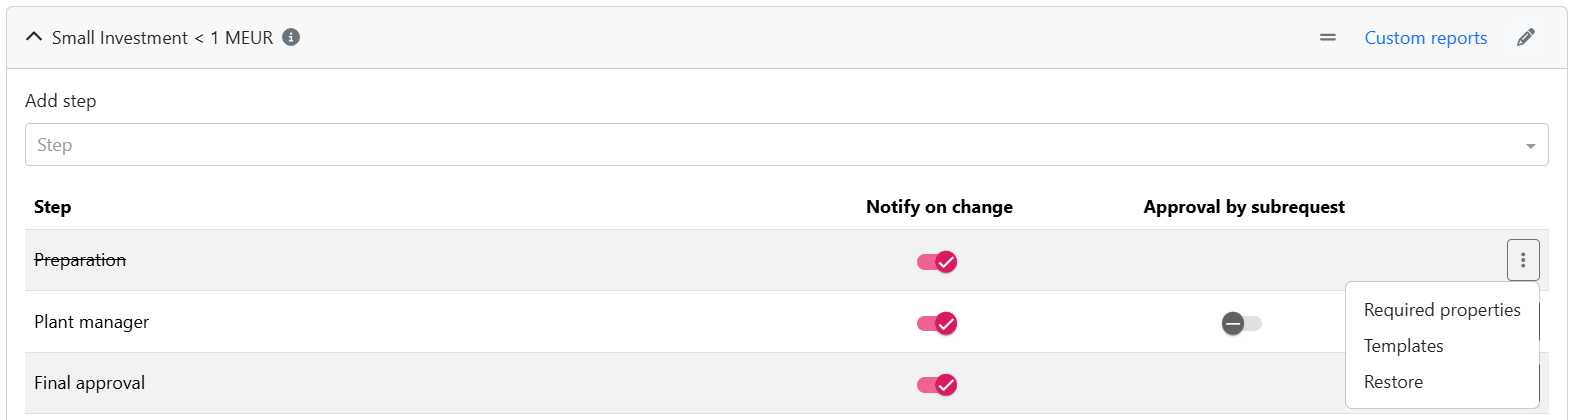
How to restore a soft-deleted route step
Expand the desired route and locate the deleted step (marked with a strikethrough)
Click the context menu (three dots).
Select “Restore” from the dropdown menu.
The step is reinstated with all its previous settings and configurations.
Configuring notifications for steps
Step notifications ensure that selected users are informed when a request enters a specific step in the approval route. These notifications are tied to the Route step changed notification, which must be enabled for notifications to be sent.
The notification content and pre-defined recipients are the same for all steps where this setting is enabled. For details on configuring notification content, refer to the Managing Notifications documentation.
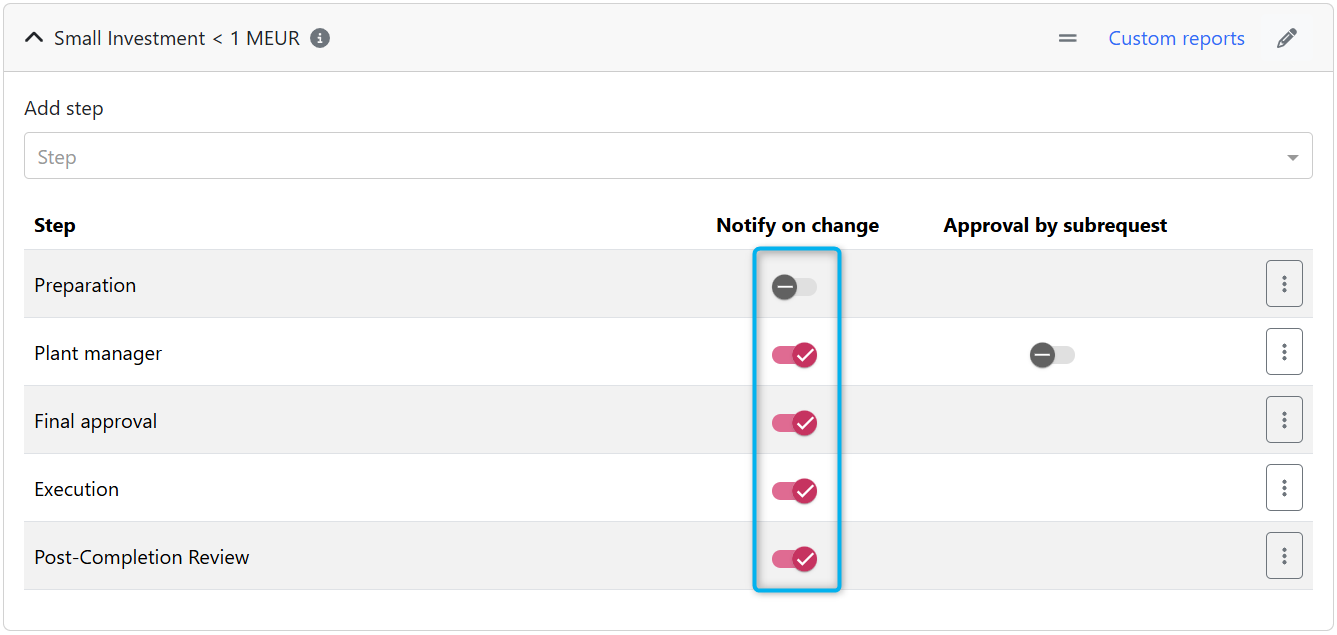
How to enable step notifications
Expand the route to view its steps.
Toggle the “Notify on change” for the desired step.
When enabled, users receive notifications via email and in-app messages when a request enters the step.
Replacing step approval with Final approval in sub-requests
Enabling final approval for sub-requests allows the approval decision to be made within the sub-request instead of the main request.
How to enable Final approval for sub-requests
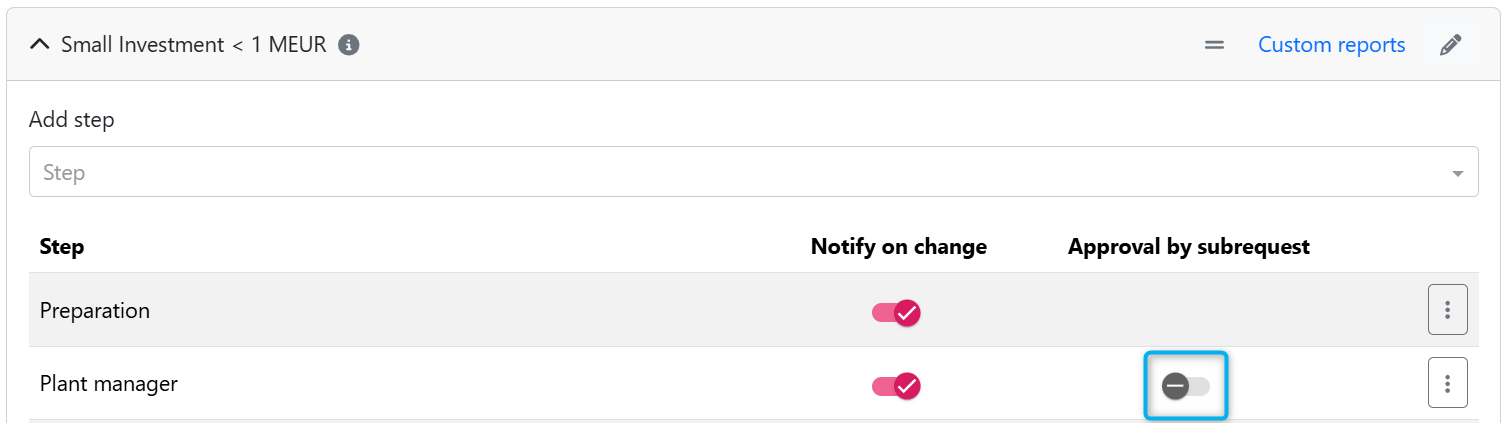
Open the route step settings.
Toggle the “Approval by subrequest” for the desired step.
Once enabled:
The step becomes read-only in the main request.
A message indicates that approval must be completed in the linked sub-request.
Users with access to both requests must manually link a sub-request to the step.
This feature is only available for decision steps before final approval and applies exclusively to the main request of the investment program. Sub-requests and regular requests continue to function as usual.
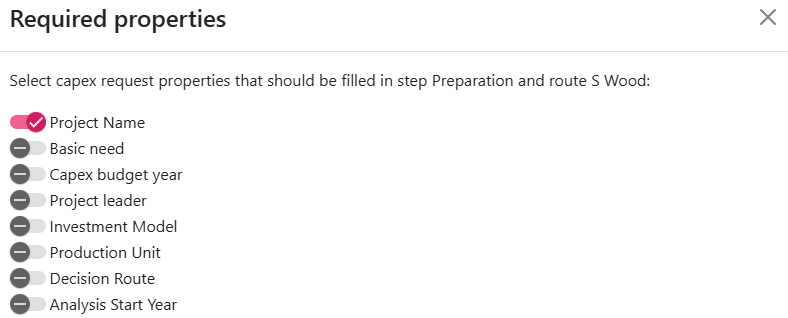
Defining required properties for routes
Required properties ensure that specific data fields are filled out before progressing through an approval step. These properties help enforce data completeness and compliance within approval routes.
How to set required properties for a route
Expand the desired route and click the context menu (three dots).
Select "Required properties" from the dropdown.
Toggle ON the properties that must be mandatory at this step.
Once a property is marked as required at a step, it will automatically be required in all subsequent steps in the route.
Understanding required properties
By default, all properties for each route step are toggled OFF.
Properties must be toggled ON to make them mandatory.
The list includes static and dynamic properties, except those that are read-only.
🚫 Properties NOT Included in the Required Properties List:
Properties with expressions
Properties that receive their value from an investment model
Properties that are not editable in any state
Read-only static properties (e.g., Production Unit, Currency)
If a required property becomes read-only (e.g., due to an expression being added), it is automatically removed from the required properties list.
A required property is indicated with an asterisk (*). If a required property is enabled but missing, the Weissr application displays a red exclamation mark.

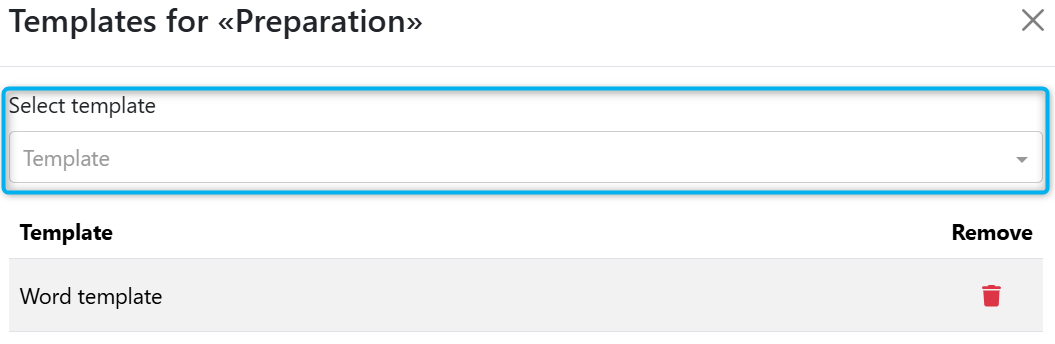
Attaching templates to steps
Templates can be attached to individual route steps to ensure standardized documentation throughout the approval process. These templates are managed in Administration → Common → Document Templates and can be used across multiple routes.
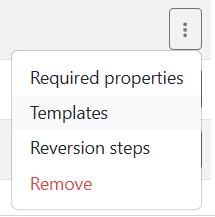
How to attach a template to a step
Expand the desired route and click the context menu (three dots).
Select "Templates" from the dropdown menu.
In the pop-up window, select a template from the list of available templates.
Added templates are automatically saved.
Configuring reversion steps and reapprovals
Configuring reversion steps
As an administrator, setting up reversion steps and reapproval requirements in Weissr Capex Management ensures that your project approval processes align with organizational policies and workflows.
How reversion steps work
Reversion steps allow requests to move back in the approval process when required. For a project to be able to move back the step needs to have a status with a move back action. If you do not see the Reversion Steps in the context menu the step is missing a status with move back action.
Requests revert to the last completed step by default.
If needed, specific steps can be selected for reversion.
Administrators can define whether reapprovals are required for reverted steps.
📌 Reversion steps ensure that changes or corrections are reviewed before approval continues.
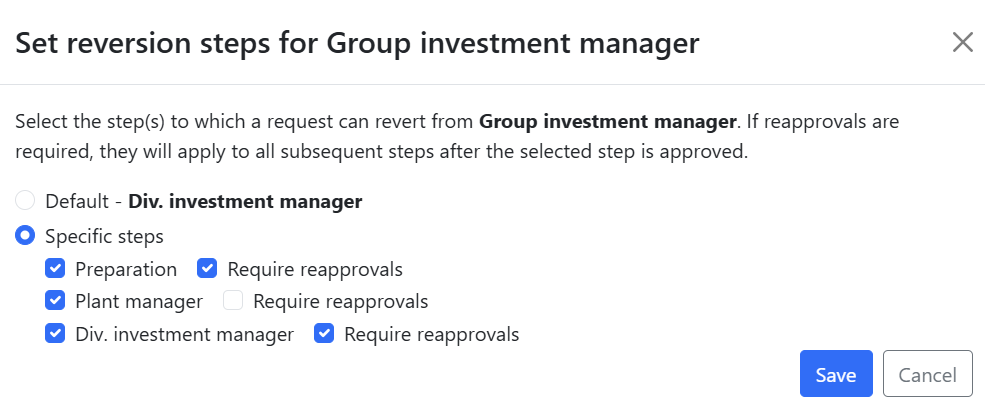
Reversion steps can be configured for approval route steps with a status that includes a move back action. By default, a project will revert to the immediately preceding step. To enable reversion to earlier steps, you must specify which steps are available for reversion and decide whether reapprovals are required for the reverted steps and subsequent ones.
Setting up reversion steps
Expand the desired route and open Reversion Step Settings.
Click the context menu (three dots) next to a step and select "Reversion Steps".
Choose which steps can be moved back to.
Define whether reapproval is required for the step and subsequent steps.
📌 If multiple steps are available for reversion, the approver must select which step to revert to.
Step reversion limitations
To maintain consistency in the project lifecycle, reversion steps can only be configured within the same project category or phase.
Reversion rules
Projects cannot move backward between major phases.
Example: A project in the Execution Phase cannot be reverted to the Decision Phase.
Projects can revert to earlier steps within their current phase if reversion steps are configured.
Exception
Projects in the Post-Completion Phase can move back to the Execution Phase under specific conditions:
The reversion must be initiated from the immediate preceding step.
The "Move Back" status must have the Next State set to Monitoring to reopen the Execution Phase.