Approval Routes - Statuses
Step statuses define a request or project's current position and decision outcome as it moves through the approval route. Each step in the route can be configured with specific statuses that guide users’ actions, such as moving a request forward, returning it for clarification, or marking it as rejected.
Statuses serve both functional and governance purposes by enforcing structured decision-making and triggering system behaviors such as approvals, state transitions, notifications, or data exports.
Each status is linked to an action (or no action) and is essential for progressing a request through its lifecycle.
Overview of step statuses
When a request enters a step in an approval route, it is automatically assigned a default status. Users with decision-making permissions can update the status at that step using a predefined list configured by administrators.
Typical status labels include:
Not Started
Pending
In Progress
Send Back
Endorsed
Approved
Rejected
These labels can be customized to align with your organization's terminology and processes.

Available actions linked to statuses
Each status performs one of the following actions:
Move Forward – Advances the request to the next step.
Move Back – Sends the request to a previous step (within the same phase) for clarification or edits.
No Action – Updates the status label without changing the step.
Reject Request – Terminates the approval process and moves the request into a Rejected state.
Export Data – Triggers export of request data to an external system (can be combined with other actions). This option is only available for organizations with active system integrations enabled.
A configured status is always required to move a request forward or backward, or to maintain it in the same step. Each time a request changes status, a copy of the entire request is created and attached to the decision history.
Configuring step statuses
Create a status
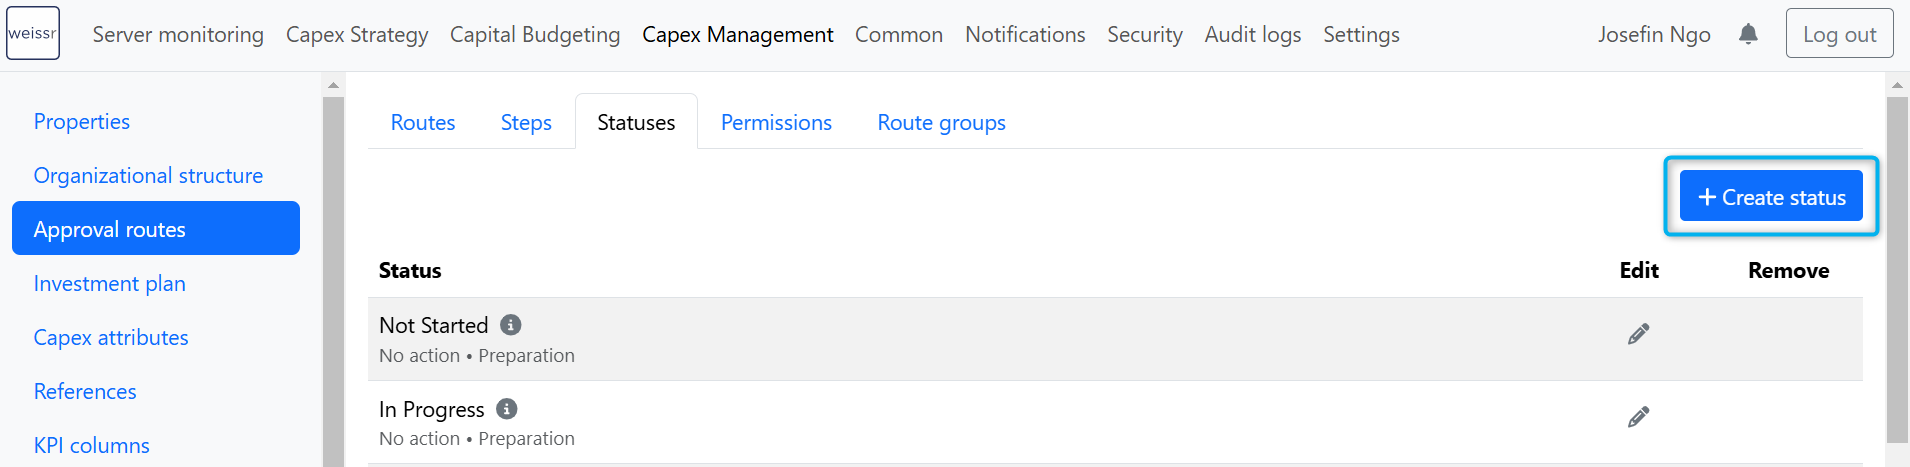
Navigate to Administration → Capex Management → Approval Routes → Statuses.
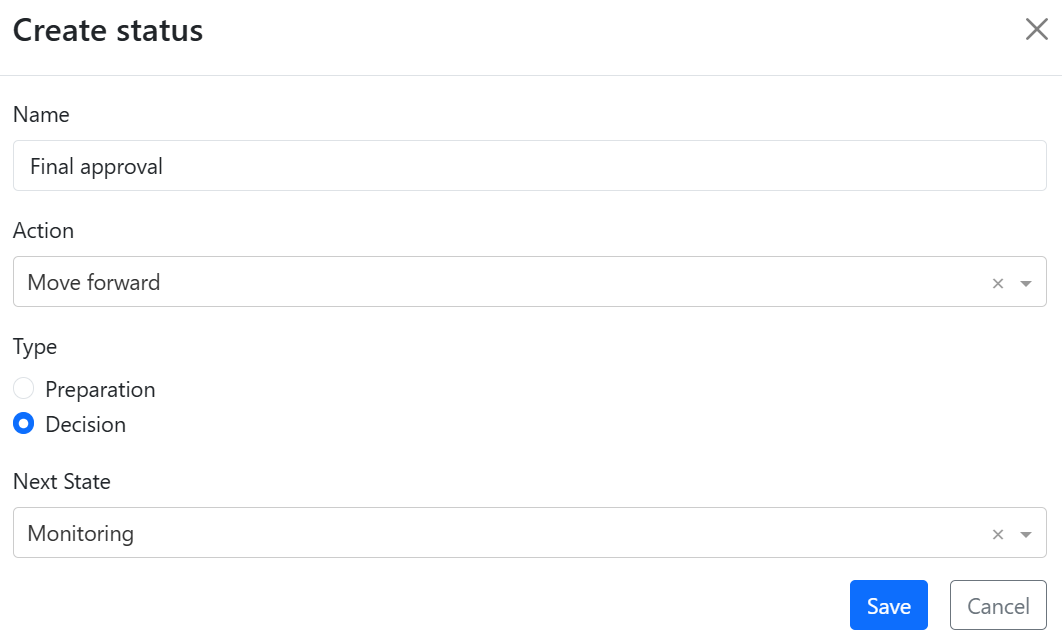
Click on “Create status”.
Enter the status name. This can be edited later by clicking the pencil icon.
Select the action:
No Action – Request remains at the current step.
Move Back – Request moves to a previous step.
Move Forward – Request advances to the next step.
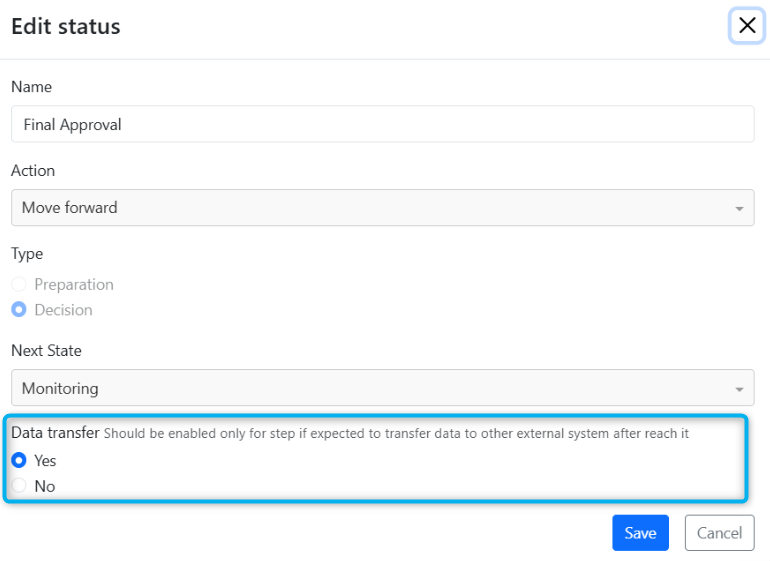
(Optional) Enable data transfer as part of the status settings (see description below). This option is only available for organizations with active system integrations enabled.
Select a status type
Preparation – Can only be assigned to preparation steps.
Decision – Can only be assigned to decision steps.
If the status is used for a major approval step select the next state. For most steps, this will be left empty.
Modifying a status
Once a status has been created and saved, the following properties cannot be changed:
Action – (e.g., Move Forward, Move Back, No Action)
Type – (Preparation or Decision)
Next State – (e.g., Draft, Monitoring, Completed)
To modify any of these attributes, the step must be deleted and recreated with the desired configuration.

Defining next states for major approval steps
For major approval steps, administrators must define a Next State. This setting determines the Request State the request will transition into when it moves forward beyond the current major phase.
The available next states are grouped into four project state categories:
Pre-Decision States
These states represent the preparation and decision-making phase before execution begins:
Draft – The request is being prepared but not yet submitted for review.
Under Review – The request is actively under evaluation by stakeholders.
Decision – The request is undergoing formal decision-making or final approvals.
Execution State
This state represents the active implementation phase of an approved project:
Monitoring – The project is being executed, and progress is tracked. Initial forms are locked, and post-decision data becomes the focus.
Post-Completion State
This state reflects the phase after project execution, where outcomes and learnings are captured:
Follow-up – Used for analyzing project results, capturing final costs, lessons learned, and other completion-related data.
Closed States
These are terminal states where the request or project is considered closed:
Rejected – The request has been declined and will not proceed further.
Completed – The project has been fully executed and formally closed.
The selected Next State controls which Request State the system applies after the request exits the current phase. This is critical for managing access, locking forms, triggering new data entry forms (e.g., post-decision data), and driving reporting segmentation.
Navigate to Administration → Capex Management → Approval routes → Statuses.
Click on “Create status”.
Fill in status name. Name can be changed in retrospect by clicking on the pen on the right side of the name.
Select action: No action, Move back, or Move forward.
If no action is selected for the status, the request remains in the same step.
Examples of no action statuses: “Not started“, “In progress“, “Queuing“, and “Rejected“.
When moving a request back, the user can add a comment explaining the reason. This comment is attached to the step from which the request was moved back. After moving back, the request updates its state and reverts to the initial step status.
It is not possible to move a request back from one major phase to another. Once the request has reached a new major phase (Monitoring/Execution or Post-completion/Follow up) it can only be moved back within the same state.
Examples of move backward statuses: “Move back“ and “Request for more info“.
When moving a request forward, the user must confirm the action and can add a comment in the confirmation pop-up.
If the step being moved forward has enabled notifications, the user can select recipients to be notified about the change.
Examples of move forward statuses: “Move forward“, “Final approval“, “Ok for follow-up“, “Completed”, and “Ready for decision“.
Select type: Preparation or Decision.
If a status is of type Decision, it can only be assigned to Decision steps. The same applies to statuses of type Preparation, which can only be assigned to Preparation steps.
For the major approval steps - select a next state: Draft, Under review, Decision, Monitoring, Follow up, Rejected, or Completed.
Next states are solely used when a request is transitioning to a new major phase of the approval process, i.e., Monitoring/Execution or Post-completion/Follow up. The selected state determines the next Request State (also referred to as major phase).
Example: Final Approval of the Registration/Pre-decision state, has the next state Monitoring. When reaching the Monitoring state, the form/capex/cash flow used in the Registration/Pre-decision state is locked and editing is not longer possible. From now on, the next form appears where post-decision data is expected to be entered.
Regardless of the action taken (i.e., where the request moves), the request state will be updated accordingly.
If the "Reject request" Notification is enabled, the user can select recipients to be notified about the change.
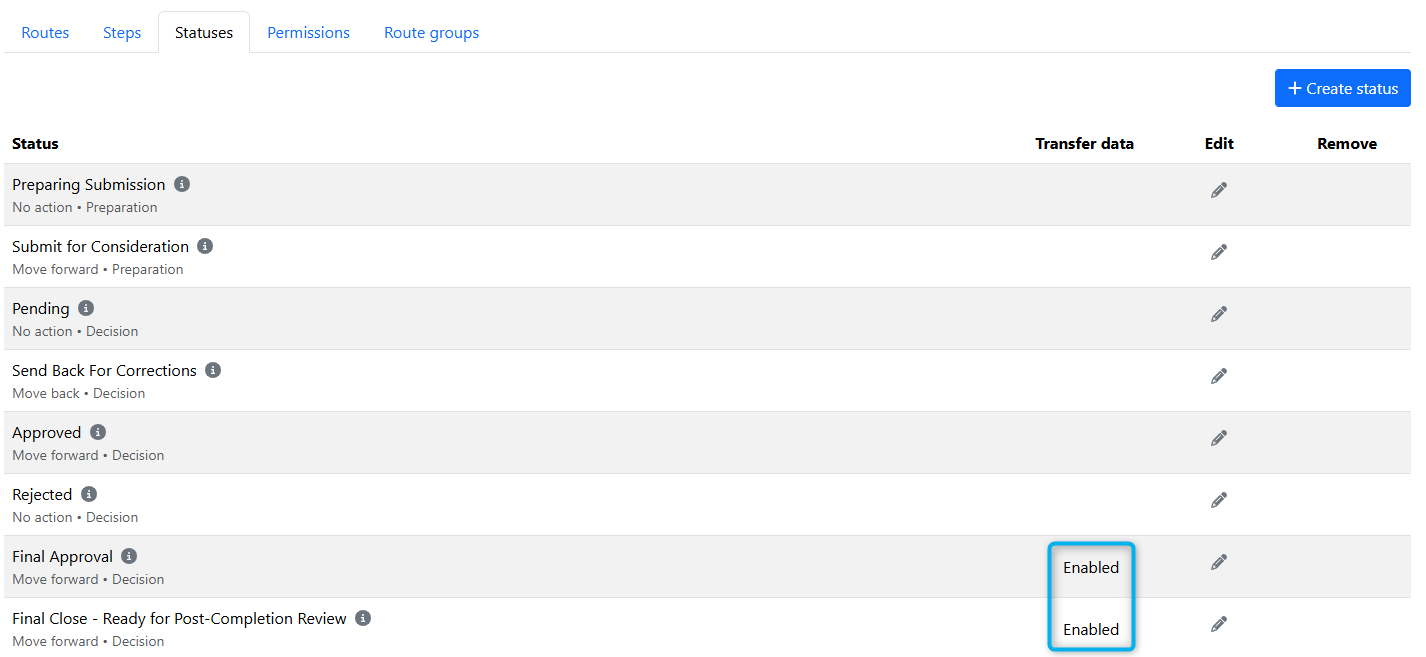
Status options for API integrations
Organizations with API integrations to external systems have access to additional status options beyond the standard ones. These organizations can activate data transfer to send project data to the external system at a specific status.