Adding widgets to dashboards
Adding a widget to your dashboard allows you to customize and enhance your data visualization. Follow these simple steps to add a widget:
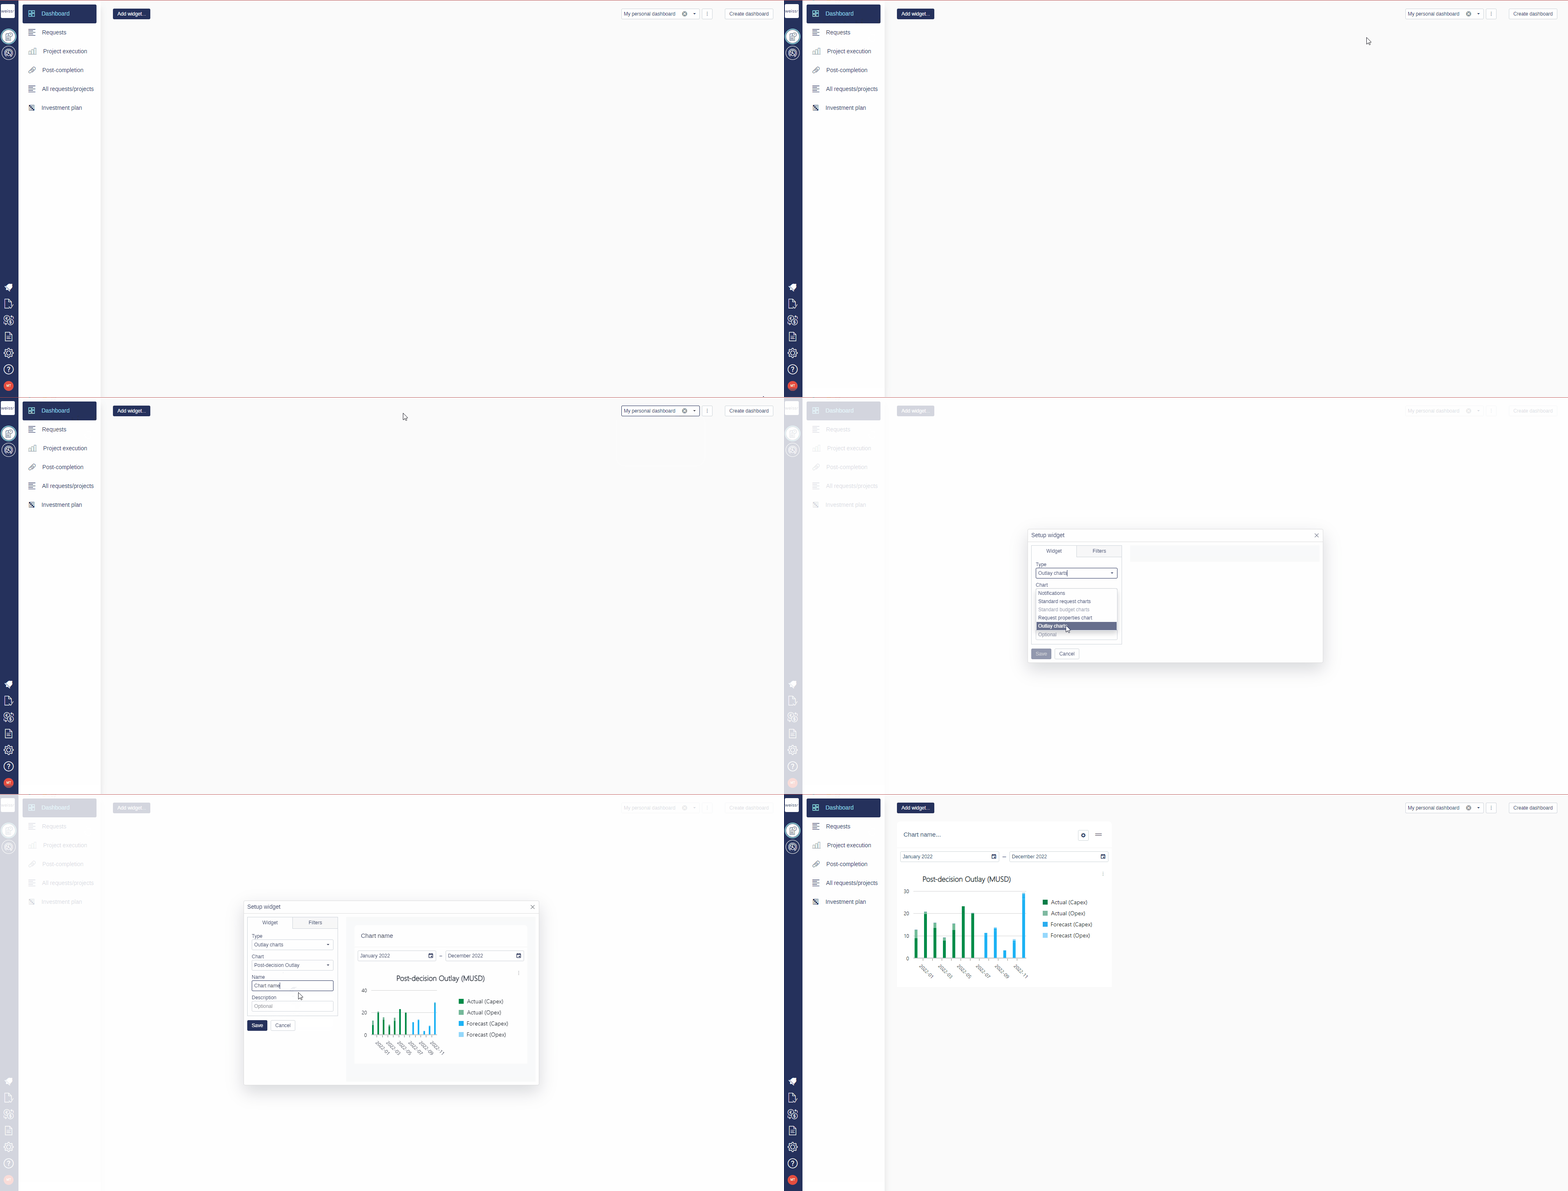
Navigate to the Dashboard: Access your dashboard by clicking the 'Dashboard' tab in the main navigation menu. Select the desired dashboard you want to edit from the drop-down.
Initiate Widget Addition: Locate and click the 'Add Widget' button at the top left corner of your screen. This action will open the widget selection menu.
Choose Your Widget Type: You can select from a variety of widget types depending on what information you want to display:
Notifications: Keeps you updated with real-time alerts.
Standard Request Charts: Visualizes data from standard requests.
Request Properties Chart: Shows detailed attributes of requests.
Outlay Charts: Displays financial data through various chart options.
Requests: Displays a list of requests, including Request name, Production unit, Approval route, Step, and Requested Amount.
Customize Your Widget:
Chart Type: Choose the chart you prefer, such as a donut or bar chart.
Data Display: Decide whether to display data by amount, property, or number of requests.
Save Your Widget: Click 'Save' to confirm and add the customized widget to your dashboard.
Apply Filters (Optional): Enhance your widget by applying filters for more precise data representation. Learn how to apply filters here.
Following these steps, you can effectively customize your dashboard with widgets that suit your specific needs and preferences.
