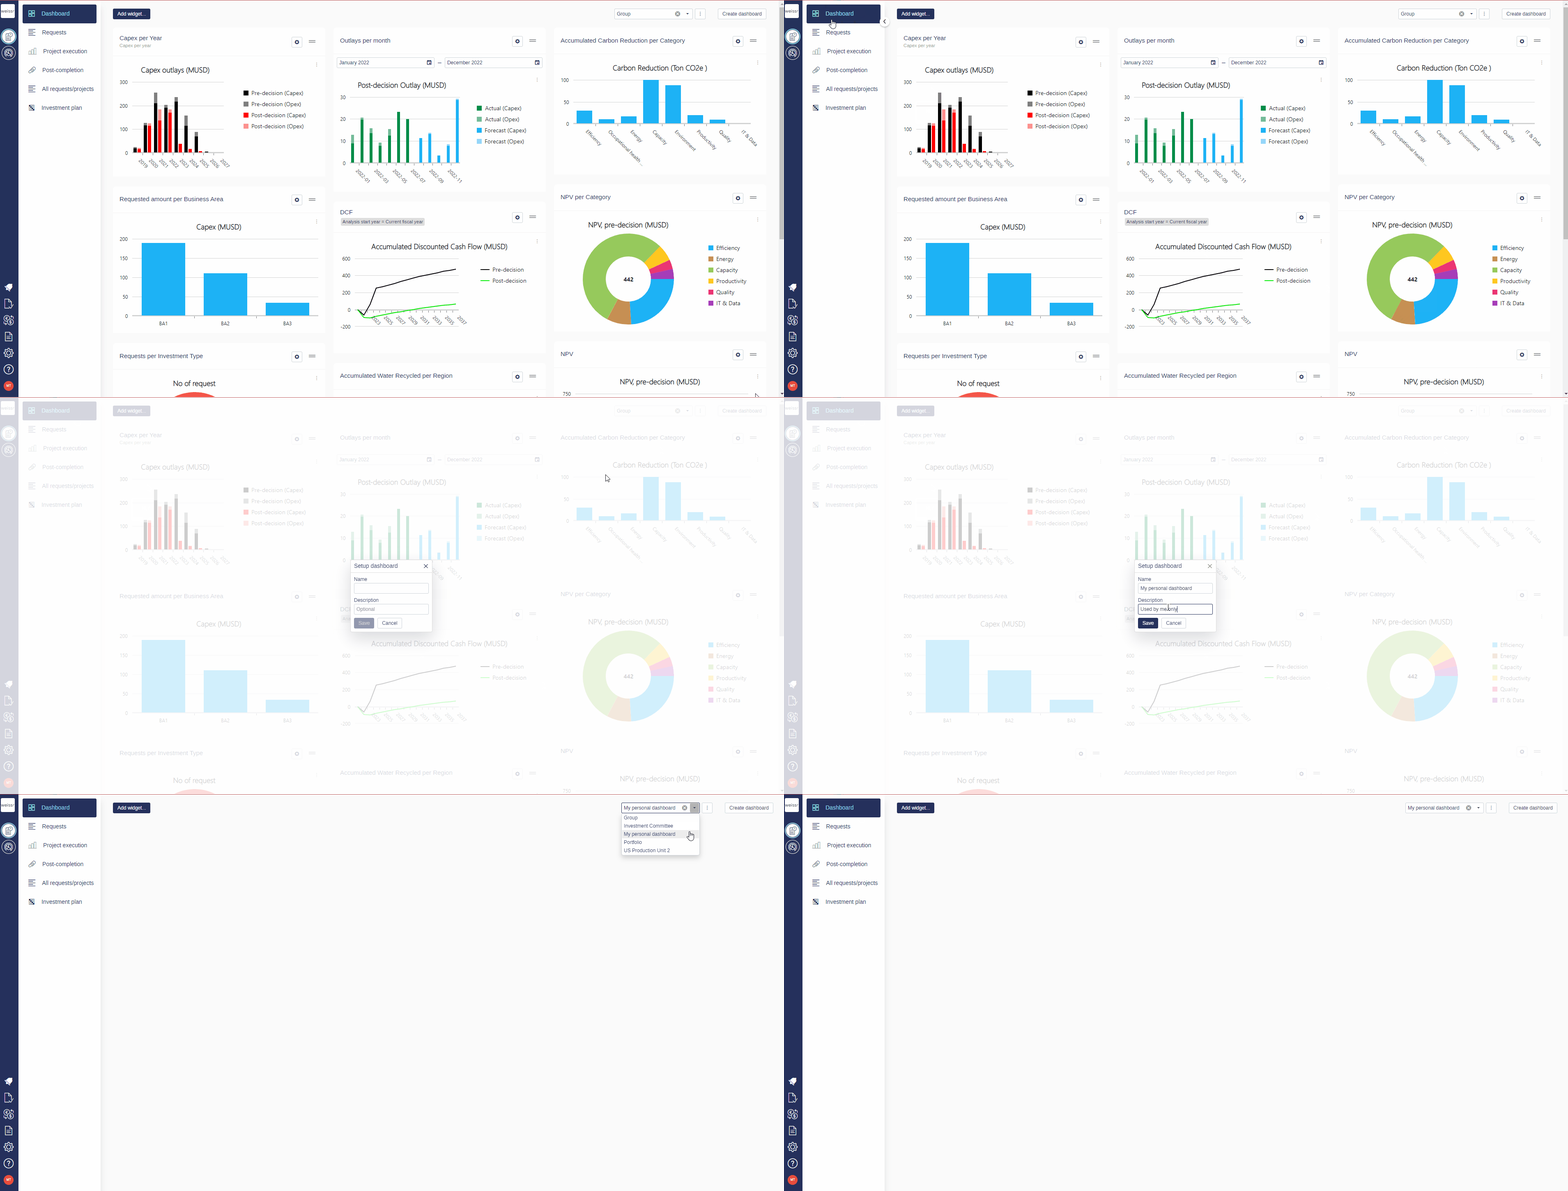
How to Create a Custom Dashboard
Creating a custom dashboard allows you to visualize and monitor key data points tailored to your specific needs. Follow these simple steps to create your dashboard:
Access the Dashboard Tab: Begin by navigating to the 'Dashboard' tab within the Weissr interface.
Create a New Dashboard: Click on the 'Create Dashboard' button located in the top right corner of your screen. This will initiate the process for creating a new dashboard.
Customize Your Dashboard:
Name Your Dashboard: Enter a name for your dashboard in the designated field to easily identify it later.
Add a Description: Provide a brief description of what your dashboard will display or the purpose it serves. This helps in understanding its functionality at a glance.
Save Your Dashboard: Click 'Save' to confirm the creation of your new, empty dashboard.
Add Widgets: Now that your dashboard is set up, you can customize it by adding widgets. Widgets display live data, charts, or other content relevant to your needs.
Navigate Between Dashboards:
To switch between dashboards, click on the dropdown menu in the top right corner of your screen.
Select the dashboard you wish to view from the list.
Enjoy personalizing your workspace with a dashboard that caters to your specific monitoring or analysis needs!
