Creating and Managing Properties
In Weissr Capex Management, properties are the building blocks that capture custom data for both capex requests and individual expenditures. Whether you're collecting basic details like cost center codes or more specific inputs like item quantities or delivery dates, properties help structure and standardize how information is entered across the platform.
This guide covers everything you need to know about creating, configuring, and managing request properties—from setting up default values to applying access controls and understanding behavior differences between capex and expenditure properties.
If you're an admin looking to tailor the request experience to your organization’s needs, you're in the right place. Let’s dive in!
How to create and configure a request property
All properties in Weissr Capex Management are managed from the same location under the Properties menu in the List tab.
To create a new property
Click + New property in the upper right corner.
Fill in the following settings:
Setting | Description |
|---|---|
Name | (Required) Display name for the property, visible to users in forms and views. |
Code | (Required) Unique identifier for the property. Used in expressions and system references. |
Description | (Optional) Help text shown to users when hovering over the field. Use this to clarify the purpose or expected data. |
Type | (Required) Specifies the type of data the property will hold (e.g., string, date, decimal). |
Default value | (Optional) Define a pre-filled value for the property, either as a fixed constant or by referencing another capex request property. |
Applicable to request type | Defines where the property will be available: Global, Capex, or Expenditure. |
Required | Select Yes to make the property mandatory: |
Can be used as filter | Select Yes to make the property available in filters used within request views. |
Editable in | Select the project phase(s) where the property can be edited: Registration, Monitoring, or Follow-up. Multiple phases can be selected. |
Receives value from model | (Capex properties only) Set to Yes if the property should retrieve values from a row in the investment model. Requires a matching row code. |
Expression | (Capex properties only) Use an expression if the property's value should be calculated based on other properties. These fields are always read-only and automatically updated. |
Expenditure aggregation | (Capex properties only) Enables a money-type property to display the aggregated outlay amount of expenditures directly on the request. Aggregation is based on the selected Category Group(s) and automatically calculated in the request’s currency using current FX rates. Aggregated values are only calculated in main requests, not in sub-requests. Values are read-only and automatically kept in sync with expenditure updates. |
Field availability and additional configuration options depend on the selected property type. Once the property is created, you can edit all fields except the property type.
Creating and managing expenditure properties
Expenditure properties are used to capture detailed and structured data for each expenditure row in a request. These fields support various data types and, depending on configuration, can be marked as required. This section outlines how to create, configure, and understand the behavior of expenditure properties.
What are expenditure properties?
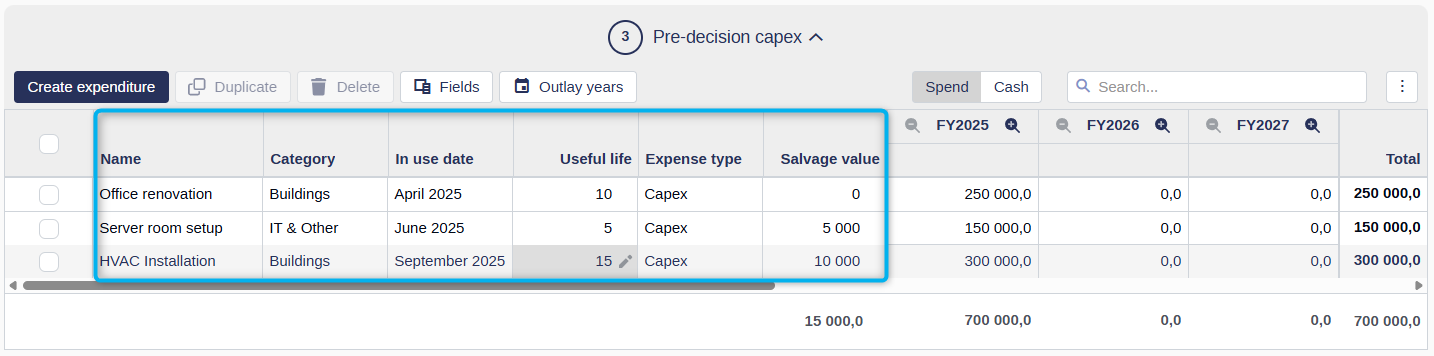
Expenditure properties are data fields that appear in the expenditure grid of a request. They allow teams to collect relevant information such as quantities, dates, or descriptions that apply specifically to individual expenditures (e.g., “Category”, “In use date”, “Quantity of items” or “Cost center”).
Supported property types
Boolean
Code
Country
Currency
Date
Decimal
Fiscal Year
Integer
Money
String (single-line and multi-line), rich text is not supported for expenditure type properties.
User
Properties not listed here are not supported for expenditure use and will not appear as options in the editor when the applicable type is set to Expenditure.
Configuration behavior and limitations
Model integration is not supported. Expenditure properties cannot receive values from the investment model.
Expressions are not allowed. You cannot calculate expenditure property values using expressions.
Editable at all times. Expenditure properties are editable at all stages of the request lifecycle. They are not restricted by project phases (Registration, Monitoring, Follow-up), unless the field is a system property with special constraints.
These constraints are designed to ensure that expenditure data remains lightweight, direct, and independent from complex investment logic.
How to create an expenditure property
To add a new expenditure property:
Navigate to Properties → List.
Click + New property in the upper right corner.
Complete the property editor fields as follows:
Name (Required): The display label for users.
Code (Required): A unique identifier for internal references.
Description (Optional): Help text shown when hovering over the field.
Required: Mark Yes to make it mandatory for users to complete when creating a new expenditure.
Applicable to request type: Select Expenditure.
Property type: Choose a supported type (see list above).
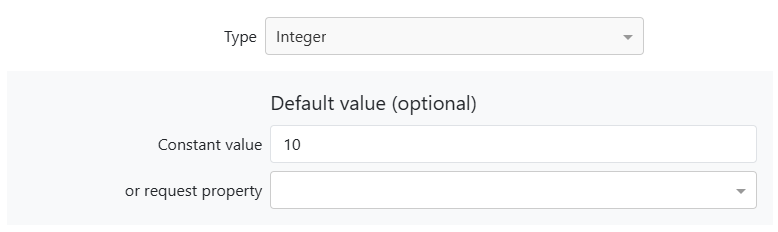
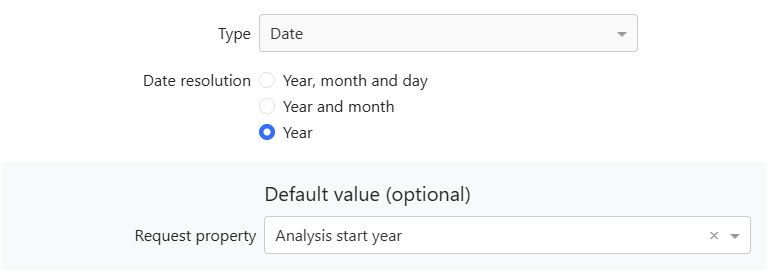
Default values (optional)
Set a constant value (e.g., “10” for quantity).
Or inherit a value from a capex request property of the same type.

Changing the display name for global properties used in the expenditure grid
Global properties can be used in both request forms and the expenditure grid. If you want them to appear with different names depending on the context, you can customize the display name specifically for the expenditure grid.
To update the display name:
Navigate to Properties → List
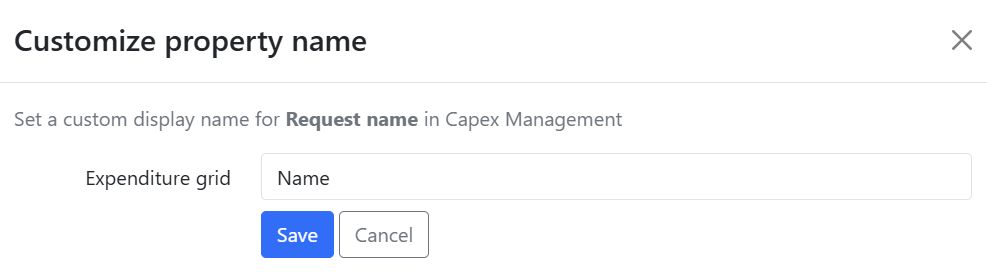
Hover over the relevant property and click the settings (⚙️) icon
In the pop-up, enter a custom display name for how the property should appear in the expenditure grid
💡 Tip: This customization only affects how the name is displayed in the grid—it does not change the property name used elsewhere in the application.

Setting default values
For select property types, you can define default values as either constants or inherited properties from other request properties. If used in expenditure properties, default values always pull from the parent capex request.
Supported types for defaults
Boolean
Code
Date (from another capex request property only)
Decimal
Fiscal Year
Image
Integer
Money
String (single/multi-line)
The list of available capex request properties to inherit defaults from will be restricted by type. That means: You can only set a default value from another property of the same type.
(e.g., a decimal property can only inherit defaults from another decimal property).
Use caution when setting capex request properties as default values for expenditure properties.
If the capex property does not have a value when an expenditure item is created, it can cause exceptions in the grid, even if the property is visible to the user.
Best practice
Only use capex request properties as default values when you're certain they will always be filled before users begin adding expenditure lines.
If there's any uncertainty, use a constant default value instead to avoid potential errors.
Restricting access to properties
Property access in Weissr Capex can be controlled at the user group level, allowing admins to set permissions independently of a user’s node access type. This ensures that sensitive or specialized property data is only accessible to the right people.
Users must have node access to the relevant production unit to interact with the request, but user group permissions determine whether they can view or edit individual property values.
Configuring a private property
To mark a property as private and restrict access:
Navigate to Administration → Capex Management → Properties → List
Locate the property you want to restrict.
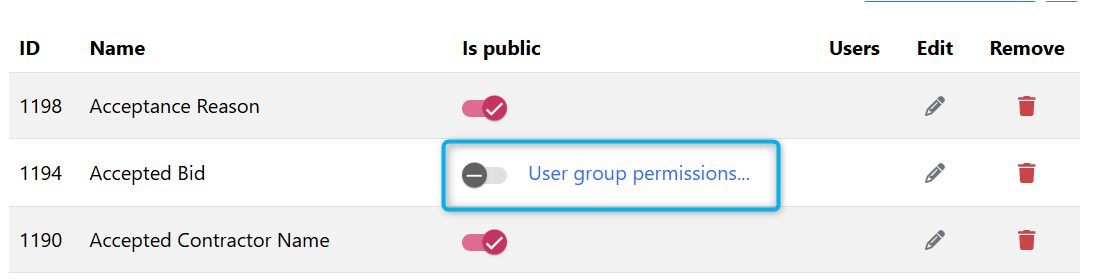
Toggle ‘Is Public’ to OFF to make the property private.
Click User Group Permissions… next to the toggle. A pop-up will appear.
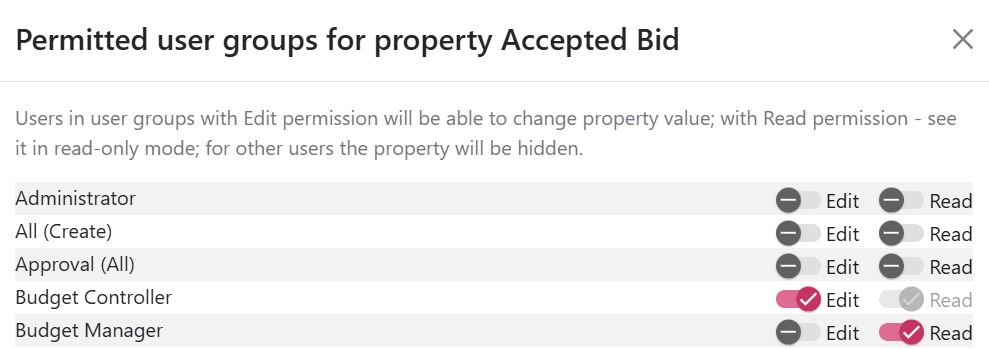
In the pop-up, assign edit or read access for the applicable user groups.
Edit: Users can both view and modify the property.
Read: Users can view the property and its value.
Note: Some static system properties (e.g., Model, Route) cannot be made private.
Important behavior notes for restricted access to properties
If no user group is assigned, the property will be hidden for all users, regardless of their request access.
Private property values may still appear through auto-selections (e.g., property dependencies), but only for users who have access to the related property.
If a user has read access to the request via their organizational unit permissions, but their user group has edit access to the property, edit access will still be denied.
Superusers always have full access to all properties, including private ones.
Do not restrict access to mandatory properties
Avoid marking required (mandatory) properties as private or restricted.
If a property is required for creating a capex request or expenditure, users must be able to see and edit it. Restricting access to a required property may block request creation or prevent users from saving expenditure lines.
Best practice: Only restrict access to non-mandatory fields that are meant for internal tracking or review by specific roles.