Ad-Hoc Notifications
Stay connected with your users in real time by sending custom push and email notifications directly from the Notifications module. The Ad-hoc notifications tab allows admins to quickly craft and schedule messages for specific user groups or all users, helping you share important updates exactly when and how they are needed.
This guide explains how to create, schedule, send, and manage ad hoc notifications.
Notification Delivery Options
The Ad-hoc notifications feature allows admins to create one-time alerts using push, email, or both channels. These notifications can be sent immediately or scheduled for a later time. You can also target specific user groups.
Push: An in-app alert that users see when they log in.
Email: Delivered like other system emails, with the system user as sender.
Push and email: Sends the notification through both channels at the same time.
Important Things to Know
If no user group is selected, the notification is sent to all enabled users.
Scheduled notifications can be edited, canceled, or sent early. Once sent, their configuration is automatically deleted and cannot be recovered.
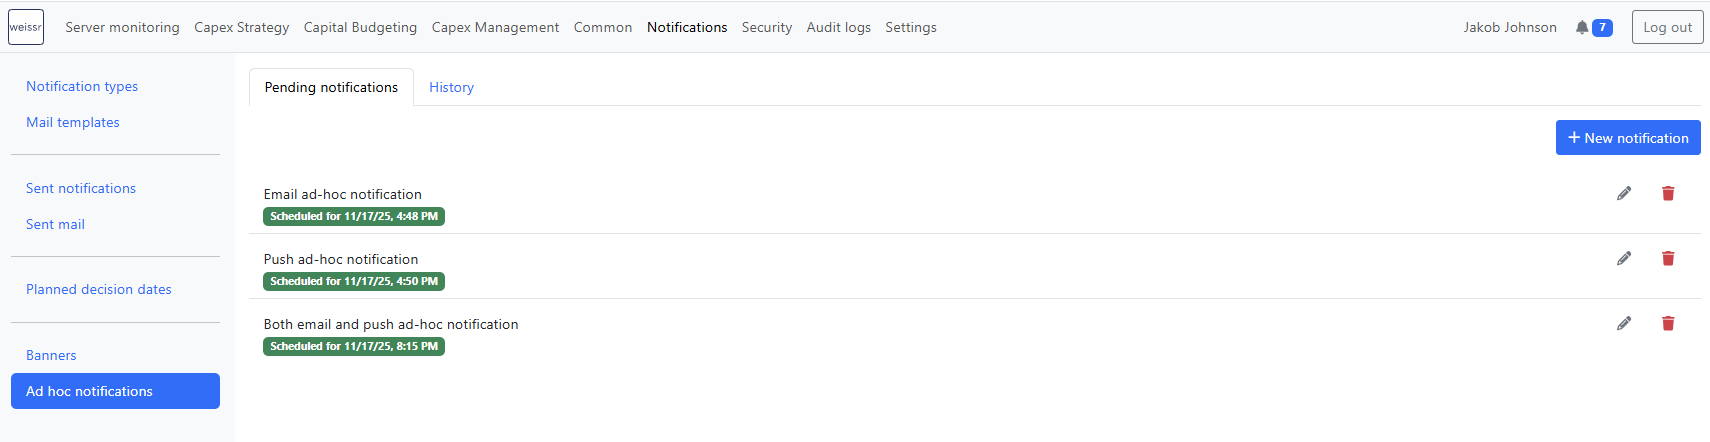
Creating an Ad-Hoc Notification
Go to Notifications → Ad hoc notifications.
Click the + New notification button
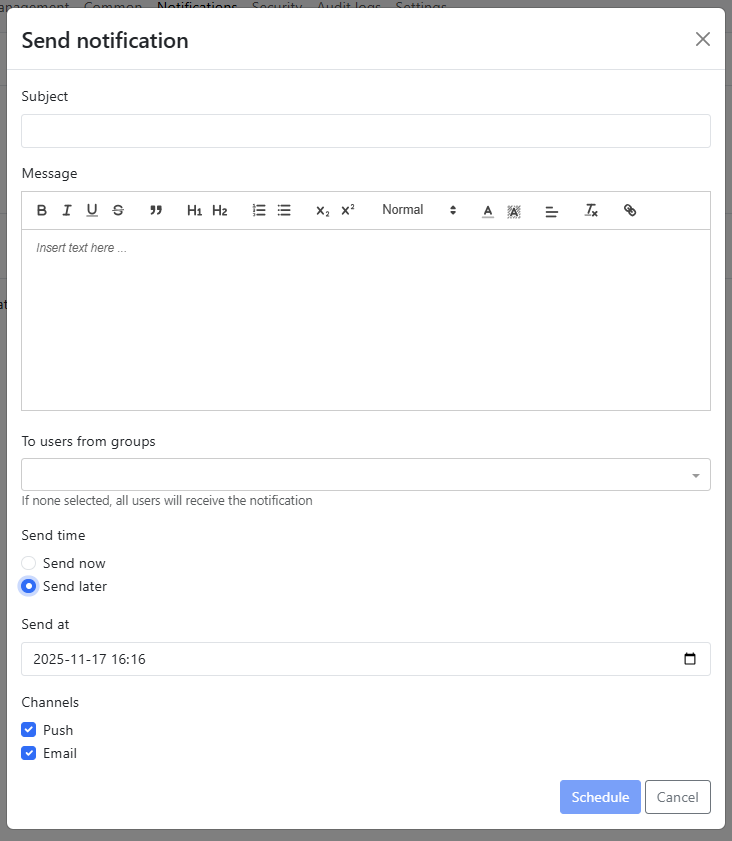
Fill out the notification details in the Send notification window:
Subject: This becomes the bold summary in the notification and the email subject.
Message: Enter your content using the rich-text editor.
To users from groups: Optionally select one or more user groups. If left empty, the message will be sent to all users.
Send time:
Select Send now to deliver immediately.
Select Send later to schedule delivery.
Channels: Choose Push, Email, or both.
Click Schedule to confirm or Send if sending immediately.
Managing scheduled notifications
Scheduled notifications appear in the Pending notifications tab:
Click the Edit (✏️) icon to open and change the message, time, or recipients.
Click the Delete (🗑️) icon to cancel the alert. This removes the configuration and it will not be sent.
Use the Execute now option (available in the edit view) to send the notification immediately.
(Warning) After a notification is sent:
It cannot be undone.
It is no longer editable or listed under pending notifications.
It is logged in Sent notifications and Sent mail, depending on the delivery method used.
Viewing sent notifications
Sent notifications are saved in:
Sent notifications: For push alerts.
Sent mail: For email alerts.
You can review what was sent, when it was sent, and who received it.